Slackware 15.0 on laptop
06 July 2022With the release of Slackware 15.0 I decomissioned my long-serving personal workstation in favour of a new one but one of the things I did not carry forward from my previous Slackware 14.2 guides was stuff related to laptops such as hibernation mode. However it is now time to fully retire Slackware 14.2 so I have given my laptop a clean-install of Slackware 15.0 and this article details the laptop-specific details of the upgrade. It is a cheap one I bought in New Zealand back in 2013 and even back then the specs were a bit stingy but it has been “good enough” for everything I asked from it so see no reason to replace it — I felt it only fair to give it more life with a new solid-state drive and updated software.

Getting started
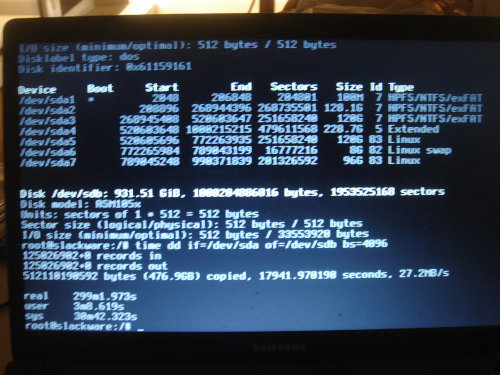
My starting-point was to do a whole-drive clone of the existing solid-state drive since rightly-or-wrongly I wanted to keep the Windows 7 dual-boot, and since the “500GB” drive I bought was actually slightly smaller than the existing drive I ended up giving the laptop a new terebyte-sized drive instead — I had bought both sizes in anticipation of this possible problem. The cloning process was done usingdd with a block size of four kilobytes which all-in took five hours.
It would also have been quicker to clone just the Windows partitons but that would have needed more intervention, whereas the full drive clone could be left unattended.
I did a load of house-keeping on the user data, most notably clearing out about 30GB of picture collections since this laptop has long since ceased being my picture repository — I did have a look through them all and set aside a few that I thought might be of interest in the near-future, but the picture sets I would likley want to look back at are already represented in my public picture galleries. I also got rid of Norton Security because it was noticably interfering with the operation of the system to the point that system tray icons were showing up as blank spaces long after system boot had finished, and in any case had serious doubts whether it was actually increasing the security of the system. I also got rid of some other utilities that after a decade of pressing the “not now” button were clearly never going to get used, as well as removing personal stuff like old copies of my electronic diary.
Base-line Slackware installation
Most of the installation followed the procedure used previously for desktop systems, and in the process made some very minor corrections; the few places where I deviated significantly from this previous procedure are briefly covered below and most of these are security-related.IceWM changes
For personal workstations I prefer to use IceWM with the SilverXP theme which is basically a clone of how WindowsXP looked by default back in 2001, and this old laptop really does need something relatively light-weight. On modern systems the theme needs changes but uncertainty on copyright precludes me providing a ready-fixed version of the source RPM package. The theme needs a patch that removes some borders and I have a futher patch of my own that stops mouse-wheel scrolls on the workspace-selector wrapping around from the last workspace to the first workspace.Disable SSH
On a laptop there is pretty much no reason to allow remote access so rather than lock it down it better to simply shut down and disable it:sudo /etc/rc.d/rc.sshd stop sudo chmod -x /etc/rc.d/rc.sshd
Firewall
With workstations and servers that are already within a secured LAN a local firewall is not that critical but on a laptop that will likely be on public wireless networks the inbound ports ought to all be locked down. In addition to the IPv4 firewall rules I created a new startup script specifically for firewalling IPv6 and plumbed it into/etc/rc.d/rc.inet2 as highlighted in the snippet below.
# If there is a firewall script, run it before enabling packet forwarding. # See the HOWTOs on http://www.netfilter.org/ for documentation on # setting up a firewall or NAT on Linux. In some cases this might need to # be moved past the section below dealing with IP packet forwarding. if [ -x /etc/rc.d/rc.firewall ]; then /etc/rc.d/rc.firewall start fi if [ -x /etc/rc.d/rc.firewall6 ]; then /etc/rc.d/rc.firewall6 start fi
The IPv6 firewall rules which are kept in the newly-created /etc/rc.d/rc.firewall6 are shown below.
These are kept separate from the IPv4 rules because in practice most public wifi networks as well as all cellular networks I have ever used have all been IPv4-only so I might just end up disabling IPv6 completely.
# # /etc/rc.d/rc.firewall6 # case "$1" in 'start') ip6tables -t filter -P INPUT ACCEPT ip6tables -t filter -A INPUT -i lo -j ACCEPT ip6tables -t filter -A INPUT -p tcp --syn -j REJECT ip6tables -t filter -P OUTPUT ACCEPT ip6tables -t filter -P FORWARD DROP ;; 'stop') ip6tables -t filter -P INPUT ACCEPT ip6tables -t filter -P OUTPUT ACCEPT ip6tables -t filter -P FORWARD ACCEPT ip6tables -t filter -F INPUT ip6tables -t filter -F OUTPUT ip6tables -t filter -F FORWARD ;; *) echo "Usage: $0 {start|stop}" ;; esac
Laptop-specific settings
The next sub-sections are the laptop-specific things that had been covered in previous Slackware articles, but have now been collected together and have been updated for Slackware 15. In most cases the instructions are the same as with previous versions of Slackware but until now this could not be checked since all my previous Slackware 15.0 installations have been desktop and server systems.Disable touchpad taps
The touchpad can treat taps as mouse button presses but this is something I dislike since it tended to result in accidental button clicks, especially when typing. The following command disables all trackpad gestures — I think it is possible to disable just taps and not all gestures but since I mostly use an external trackball I have not played around with different settings.$ synclient -l | grep Tap TapButton1 = 1 TapButton2 = 2 TapButton3 = 3 $ synclient TapButton1=0 $ synclient TapButton2=0 $ synclient TapButton3=0
Hibernation support
Technically even desktop systems can be hibernated but it only makes real sense with laptops, since in practice it is only laptops that need frequent powering up and down. Hibernation stores memory content in the swap partition for reloading when the system is next booted and for a system with 2–8GB of physical memory it is recommended that swap should be at least double the amount of physical memory. To enable hibernationresume=/dev/sda6, where /dev/sda6is the swap partition, needs to be appended to the kernel boot parameters.
In Lilo this is done by editing the append parameter as shown in bold below:
# Append any additional kernel parameters: append=" resume=/dev/sda6" prompt timeout = 50
In Slackware 15.0 the previous pm-utils package has been dropped in favour of elogind so triggering a hibernation is now done using the following command. Unlike the previous dbus-send commands this can be used by non-root users.
loginctl hibernate
System suspension
Unlike hibernation that dumps memory content to the swap partition then shuts the system down, system suspension instead puts the system into a low-power mode where physical memory is still powered. While it still uses power suspending & resuming a system is a lot quicker than hibernating and restoring it. Suspension can be activated using the following command, and as with hibernation it useselogind:
loginctl suspend
When a system is suspended the power LED on the front pulsates in order to destinguish a suspended system from a hibernated or shut down system.
Battery capacity
At least in Samsung laptops there is a “battery life extender” option that limits the maximum charge of the laptop to 80% of maximum capacity — I don't know the chemistry behind so cannot say how much of an effect it actually has, but the idea is avoiding full charge helps extend the life of the battery. I normally have this enabled (i.e have charge level capped0 and only occasionally disable it in order to take the charge upto 90% just before taking the laptop out to somewhere where I will not be able to plug it in. To enable battery life extension use the following command:echo 1 > /sys/devices/platform/samsung/battery_life_extender
And to disable it (i.e. allow 100% charge) use the following command:
echo 0 > /sys/devices/platform/samsung/battery_life_extender
As with the hibernation command this can be setup so that non-root users can activate it.
Screen brightness
As with Slackware screen brightness can be controlled byxbacklight but it seems the syntax has changed slightly compared to Slackware 14.2 in that an absolute percentage value needs to be specified after an equals.
I am sure that under Slackware 15.0 the brightness that corresponds to zero is significantly dimmer than what it was under Slackware 14.2 but this could be false memory.
$ xbacklight = 20
However out of the box I got the following error:
$ xbacklight No outputs have backlight property
I am guessing the cause is the X-Windows server treating the display as a generic one rather than the Intel Graphics chip within the laptop itself, since the fix is to put the following into /etc/X11/xorg.conf:
Section "Device" Identifier "Intel Graphics" Driver "intel" Option "Backlight" "intel_backlight" EndSection
Wireless networks
Slackware 14.2 had a nice utility called Wicd that sorted out wired and wireless network connectivity but it was implemented in Python 2 which is now deprecated and hence is not part of the Slackware 15.0 disk-sets. Instead NetworkManager has included which in the past I have found to be a pain up the arse and avoid it like the plague on desktop and server systems, but on laptops which need frequent network changes via user-land utilities it is the easiest thing to use. NetworkManager is a framework that is now standard on other distributions such as Ubuntu and seems specifically made for tools-based network configuration. I initially used the NCurses-based nmtui (Network Manager Text User Interface) but prefer to use the graphical NetworkManager system tray applet whih can be loaded by IceWM on start-up by putting it into~/.icewm.startup as hightlited below.
#!/bin/bash nm-applet &
Note the trailing “&” and that this file needs to be made executable — IceWM calls it on startup.
Root vs. non-root configurations
One thing that caught me out since I initially usednmtui from a root console in order to do some installation tasks is the ability of non-root users to use wireless networks configured as root but not make any changes to them — in my case I wanted to disable automatic connection but wondered why it would not let me save the new settings.
Getting round this requires the configuration to be deleted as root and them re-added as non-root.
Old Wicd login details
It is possible to retrieve old Wireless network authentication credentials from Wicd's configuration files since it keeps them around in cleartext form, but the place it stores them is a little odd and needs root access to get at manually. At first I looked at the configuration files under the directory/var/lib/wicd/configurations but these are autogenerated files that Wicd passes onto whatever does 802.11 encryption and usually only contain pre-shared keys that have been hashed using wpa_supplicant.
The main Wicd configuration file /etc/wicd/wireless-settings.conf contains the keys in their original and are usually but not always in the key field — below is an example entry for a conference I was at:
[88:5B:DD:19:28:58] bssid = 88:5B:DD:19:28:58 use_global_dns = 0 encryption = True hidden = False channel = 6 mode = Master psk = 6076f4091a1c65f1e088cf7c305e9cf72d706cb8e34369c20ccfe6f4ae8d0276 netmask = None key = DPDK2019 usedhcphostname = 0 bitrate = auto enctype = wpa allow_lower_bitrates = 0 use_settings_globally = 0 use_static_dns = 0 encryption_method = WPA2 essid = DPDK search_domain = None beforescript = None afterscript = None predisconnectscript = None postdisconnectscript = None
VPN client security
The previous Strongswan VPN guides assumed unsecured login keys but for a laptop that will most often be in unsecure locations these should be encrypted and needing the password to be specified on every use. The following command will encrypt the private keyunsecured.key.pem and save the encrypted key to encrypted.key.pem — it will prompt for the password to encrypt the key with.
openssl rsa -in unsecured.key.pem -out encrypted.key.pem -aes256
The /etc/ipsec.secrets then needs to be modified so that it has the %prompt parameter as shown:
# ipsec.secrets - strongSwan IPsec secrets file : RSA encrypted.key.pem %prompt
One slight gotcha: With Strongswan v5 and later if a private key is not unlocked then ipsec up simply fails rather than prompting for a key.
Instead the key needs to be unlocked using ipsec rereadsecrets which prompts for any required passwords.
If no password is given then the key remains locked, or is relocked if it was previously unlocked.