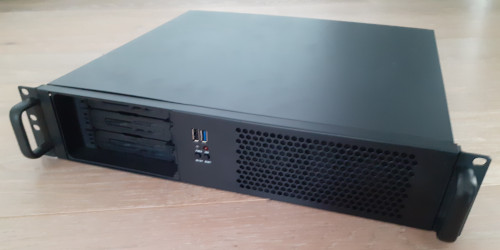
Another 2U case modding
20 May 2023After much headaches with computer hardware over the last six or so months of last year I ended up with almost enough space parts to build three new systems, and with the price of components seriously going through the roof decided I may as well make use of these parts. Since one of the motherboards was a mini-ATX that actually had working on-board graphics and I had got a stock of ultra low-profile CPU coolers I decided to once again try out using a 2U case. This case as far as rack-mount server cases go was pretty cheap but the build quality was also a bit below par, though on the plus side it meant less guilt about butchering the case.
Modding the power supply
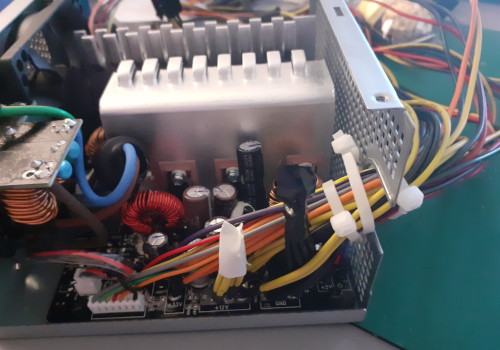
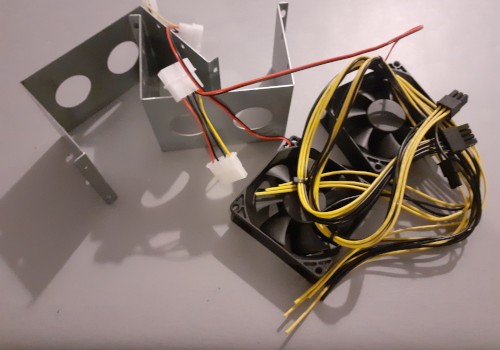
I managed to source an ATX form-factor power supply that was suitable for use in 2U cases, which has the fans at the ends rather than on the top or bottom, but being non-modular it had a lot of wires coming out of it and squeezing all of these into the case was a right pain. My suspicions were that they would also impede air-flow and since some of them would never be used such as the PCI-Express power leads for GPUs the best thing was to remove them. It also felt best to detach them from the power supply circuit itself rather than leave them sticking out of the back of the power supply, either getting in the way or even worse shorting out on contact with some metal.
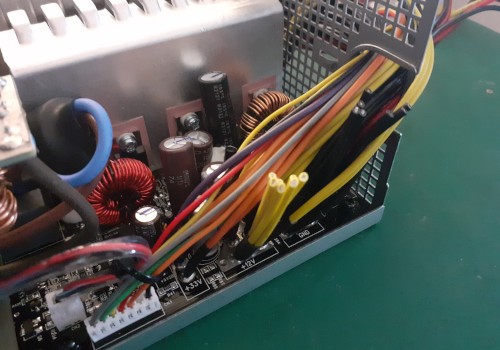
I had thought of desoldering the PCI-Express power leads but decided this was more trouble than it was worth. At one point I had thought of shrink-wrapping the individual cut wires but since they all seemed to be coming off a common power rail they were simply all taped together since they were already common to each other. From there replacement cable ties were used to secure the remaining wires back in place. I was going to remove one of the four drive power leads as well but in the end left it in place since it might actually be useful.
Making space in the case
Since the two drive bays were taken up with a 3-drive rack which in turn used up three of the four SATA connectors, I then had the idea of removing the internal 3.5" drive racks since they were basically never going to get used and this gave a critical amount of extra space to tuck in the remaining power leads. I also removed the cheap fans as they are far too noisy and if the extra ventilation was required I would put in a motherboard-controlled quiet fan that only spins up when it is really needed. Doing all these things meant that while the case was still a little tight it was not the insane sequeeze getting things in it would otherwise had been.
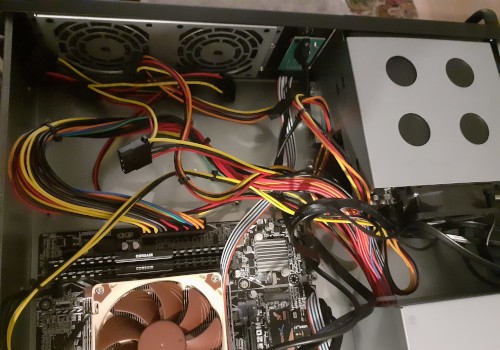
I suspect the amount of stuff removed from the case may have compromised some of its rigidity, but looking back I don't think this case would have been usable had it all been left in place. The external drive bay uses three of the four SATA connectors on the motherboards and there simply is not the room for the sort of graphics cards that would need external power.
Getting M.2 SSD working
Being a very compact case I decided to try using an SSD that plugged straight onto the motherboard. I have previously complained about trying to get a Mini PCI-Express SSD working as a boot device under Slackware 15 so this is something I decided to give another try and as it turned out all I needed to do was run Lilo with the correct parameters, which basically meant using/dev/nvme0n1XXX as the MBR location and /dev/nvme0n1p1XX as the boot/root partition.
The odd thing was the parameters were already correct within the Lilo configuration from the running of the installation DVD but for some reason even though Lilo was picking up the kernel it when then panicing trying to load the root file-system.
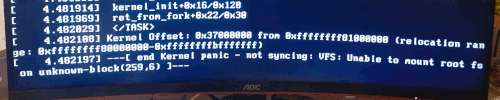
The trick was to follow the procedure for recovering a screwed-up Lilo install which in basically involves booting using the installation DVD, chrooting the broken system, then re-running Lilo. This is something the installation process is supposed to do in the background, so I have no idea why it failed, but I cannot discount pilot error in this case.