Modding 2U server cases
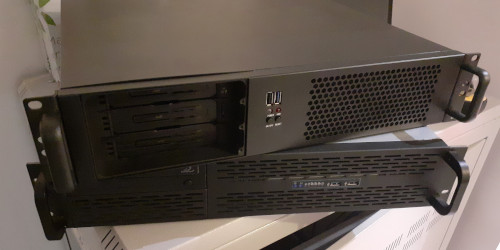
19 May 2023As a general rule I think 2U server cases are more trouble than they are worth and recommend going for 3U ones instead since the extra “U” of height makes a lot of difference, but since I am in the process of rejigging my server cabinet it felt a good time to do some customisations to the two servers I have that are installed within 2U rather cases than my preferred 3U — one existing server and one newly built machine — the latter one will be covered in the future. Certainly some if not all the modifications made were not strictly necessary as with a lot of other things I write about, it is as much about process as outcome.
Enlarging the vent hole
The server is one that I built back in mid-2021 using parts recycled from an older system but one of the problems it had was the ATX power supply that had its intake fan on the top. I tried using a Dremel to cut a hole but I felt that the airflow in the case might not be good enough given the heatsink that did not leave much clearance so I left the top cover off completely. For a long time this did not matter as it was installed into the top of my server cabinet, but eventually decided that I did not want the insides totally exposed so decided to add a grating over a larger top vent.
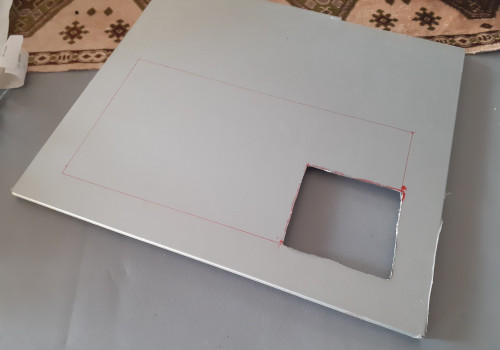
This was as much an excuse to do a bit of metal-work as anything else and at £36 a proper mini angle grinder did not seem very expensive. It also did a far better job in only a fraction of the time although it left a lot of sharp edges, perhaps because I accidentally used a blade intended for stone rather than steel. Once the hole was cut the next thing was to take off these sharp edges which was done using a flap disc which is basically an angle grinder disc lined with sandpaper. Although the result was not perfectly smoothed it at least got rid of all the chaff which was the major hazard with the edges.
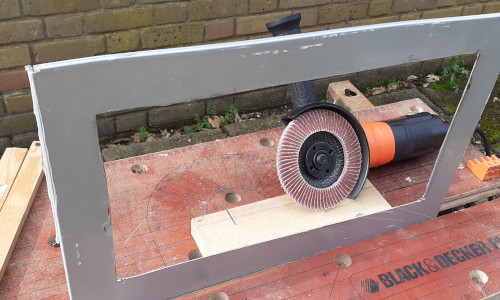
A big screw-up
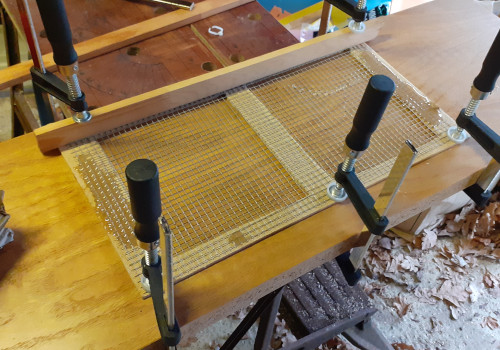
My original plan was to use wire mesh but due to difficulty with it not being completely straight it was anchored down to a hard-board frame, which in itself was an interesting project but in the end proved to be the wrong approach and as a result only a quick summary of this attempt is given here. I had not accounted for there being zero clearance between the case and power supply, and by the time I had realised this I managed to locate a much more rigid steel panel.
Looking back the way the wire mesh should have been attached to the hard-board frame was to use hot glue to anchor it down as this solidifies within a minute, and then use spots of epoxy resin to properly secure it in place. In practice I had used clamps to keep the mesh flat for the day or two the epoxy needed to cure but this method did not really work out that well and the amount of epoxy used was excessive. Having said that woodwork is not my speciality and overall I was happy with the results if not the final outcome.
On the plus side this attempt resulted in a significant purchase of extra tools and of which I subsequently used for other things. Many quality DIY tools are not that expensive on the grand scale of things and one thing I have learnt from the past is the ultra-cheap stuff from thrift stores are usually not up to the task.
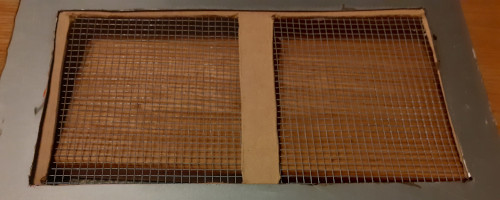
An all-metal solution
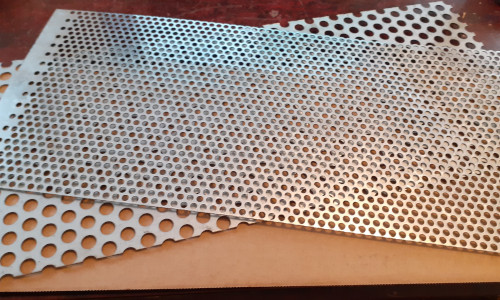
One problem with E-Bay is sometimes not really knowing what one is buying, but I managed to find some rigid panelling that would allow air flow so ordered in same samples — it was listed as “perforated sheet” which makes sense seeing a picture but before then I was using terms such as “mesh” that pulled up the wrong things. One other thing to keep an eye out for is galvanisation as mild steel sheets I bought in the past rusted surprisingly quickly and ideally I would have opted for aluminium rather than ferrite metals. Two plates with different perforation diameters were obtained and these are both shown below; the one with the smaller holes was eventually used.
Only certain pre-cut plate dimensions were available from the E-Bay seller and while there was one of pretty much spot-on width its length needed trimming, and just getting round to doing this delayed completion of the project by several weeks. It was the same angle grinder procedure that was used for enlarging the vent hole on the cover, although the relatively flimsy perforated plate was sandwiched between two shelf planks rather than held vertically in an old workmate bench.
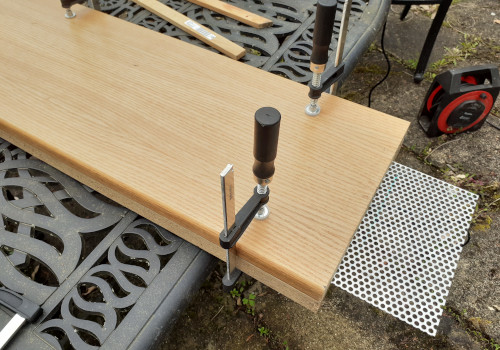
With the original wire mesh I had considered brazing it onto the case but I suspected there was a non-metallic coating on the case that would have made this difficult. Annoyingly it also had to be attached to the outside of the case hence why I used the thinnest metal plates I could find. The simple solution of double-sided tape proved to be the answer and had I known how things were to turn out I would not have bothered removing this server from the cabinet, since it could have been suck in place while stil in-situ.

The thickness of the plate meant that it could have been put flush with the case, but cutting it to the right shape and welding it into place would have been too much effort for a project I felt had dragged on long enough as-is. This is something I may well do in the future as a mini-project but for time time being this server is going back into the top of my cabinet.