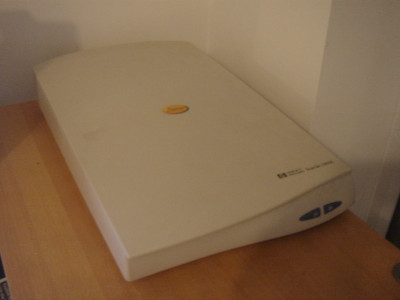
Testing an old ScanJet 3300C
08 April 2022While the details of why are long lost to the mists of time back in 2000 I was provided with a Hewlett Packard ScanJet 3300C which at the time I do not remember using and it was only for a brief period in mid-2012 I recall using at at all. However as part of a tidy-up I decided to get it out of its box and set it up for use because even though a have rarely needed to scan stuff it actually took up less space being setup for use next to my professional workstation than just sitting in its box, and in any case if it was not going to be used after twenty-two years it should simply be got rid of.
The actual need
Over the last ten years I think I used a scanner at most a dozen times and the vast majority of those were company-related in one way or another such as my Chinese visa application, and documents related to starting or ending of employment — in other words when people needed a copy of something after I had signed it for use in an official capacity. When I wanted to digitise something for personal use such as a cartoon in a newspaper it had been far more convenient to use a camera, either because I was out on the road or because it was a pain to get the scanner to use TIFF/JPEG rather than PDF, but when it comes top A4-sized documents I prefer to scan rather than photograph them due to problems getting things straight. During lockdown overseas there were quite a few times I ended up going to the local city library to get things printed but I can only recall a single time I went there to get something scanned. These days most of the things I would want to scan I already get a PDF copy of as well, but there are exceptions and with my new life I want to minimise the amount of paper I keep hold of.Up and running
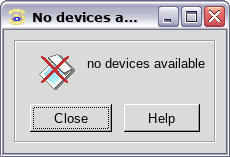
From the one time I had used the scanner previously I knew that it worked under Linux using SANE (Scanner Access Now Easy) which is now a core part of the latest Slackware, and being a USB-based printer pretty much everything is detected automatically by the scanner software. The only complication is non-root users needing to be a member of thelp group in order to access the scanner, since this is the group that the scanner's block device is assigned to, otherwise they will get no devices available error messages as shown below.
I suspect a logout & login might be needed for the group change to take effect.
An alternative fix is to change the permissions on the scanner itself which can be done using the one-liner below that needs to be run as root. It looks up the scanner in the USB listing, works out what the device name is based on the USB bus numbers, and then sets it to be world readable/writable. It is also possible to setup udev to do this automatically when the scanner is plugged in.
chmod 666 `lsusb | grep ScanJet | awk -F'[: ]' '{print "/dev/bus/usb/" $2 "/" $4}'`
SANE is really just an API and I have no doubt there are better front-end programs than xsane out there, but for testing purposes it is the one I used and to be fair it gets the job done.
For pictures GIMP can be used as a front-end with pixel data going straight into a new GIMP image, and I have comer across command-line tools that will be of interest to people who want to script everything.
To be fair xsane is a lot better than the LCD control panels on most stand-alone scanners that directly write to USB drives.
Quality & Performance
Being able to scan 600dpi is good even by today's standards since most scanners I come across seem to be setup for 300dpi or less, but the scanner is certainly significantly slower then modern stand-alone printer/scanners and I think this is down to what hardware was like at the time. The table below shows show long it took to scan a single A4 page and save it as a PDF file for the four resolutions available inxsane, and the size of the resulting file.
Not sure if any real compression is being done by the software as I could not find any settings for PDF files though I did find compression settings for other formats such as JPEG, so if quality vs. size was an actual issue I would scan directly into something like GIMP instead.
All the scans were done at full colour as choosing even the monochrome lineart as the colour depth made no different to the scan time — this will be discussed a bit later.
| Resolution | Scan time | PDF file size |
| 75dpi | 20sec | 1.3MB |
| 150dpi | 24sec | 5.2MB |
| 300dpi | 50sec | 21MB |
| 600dpi | 4mins | 83MB |
I would not bother with 75dpi since it takes about the same time as 150dpi and running it through a program that gives greater control on compression settings would get the file size down without as much loss of image quality; conversely I did not see any real on-screen difference between the 300dpi and 600dpi scans and the four minute scan time is just too long. Therefore practical use is between a 150dpi scan taking a bit under half a minute, and a 300dpi scan taking a full minute. These scans were done at full colour but even choosing lineart as the colour depth made no different to the scan time, so it is clear that the scanner is just throwing the raw scanner pixels over the USB connection and letting the host workstation do the actual processing. However the scanner uses USB 1.1 Full Speed which has a theoretical maximum of 12 megabits and I suspect other bottleneck mean that even this thoretical maximum is not obtained by the scanner's circuitry, and this is why scanning is painfully slow.