Cutting an LED display slot
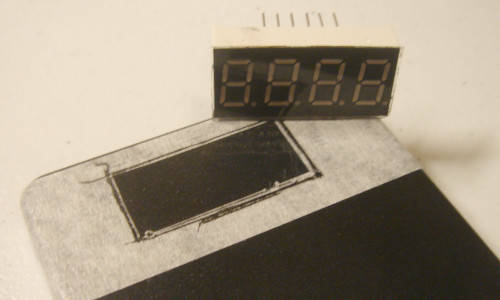
21 August 2025An electronics project only feels truly complete when it has been mounted inside a nice enclosure, so over the last week has been me experimenting with the modding of such enclosures where the major part of the mechanics and craft of preparing the case is cutting the opening for a display. In this case a 4-digit LED display is used as a means to an end as unlike past projects where preparing an enclosure has been the finishing touch of a much larger project, the focus here is on the techniques rather than the end product.
Looking at past enclosures a nibbler tool had been the tool of choice for component fitting but this tool was not available so here most of the process was instead done by filing, and for this a small selection of files of various sizes were bought in as I was unsure exactly what was needed. The pictures below are from multiple attempts so the ones shown are to best show ideas rather than follow any strict sense of chronology.
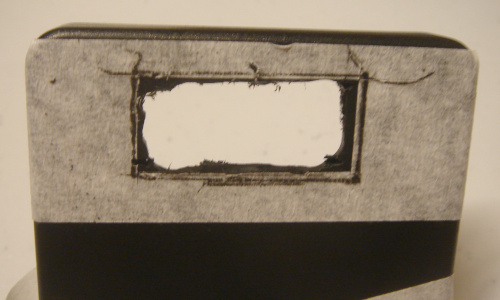
The rough-cut
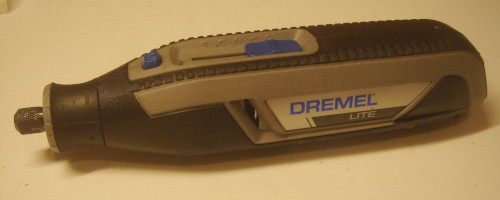
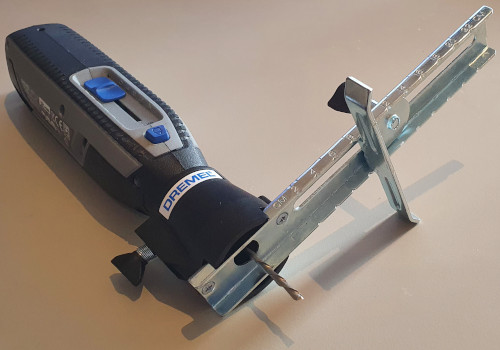
The go-to tool for this type of work is a Dremel, and by this I mean an actual Dremel and not one of the substantially cheaper who-is-this brand “rotary tools” that are in abundance on Amazon, because as with most cheap(er) tools it ended up not being up to the task and having to be replaced. Rather than wait until I was next down in London where my corded Dremel 300 is I bought one of these low-cost alternatives and it malfunctioned almost immediately, so sent it back and got the real deal of a Dremel Lite.
The cutting discs included with my previous Dremel were not really suited for plastic as they relied on friction that tended to melt the plastic rather than chip it away, so I bought in some some circular wood saw blades which I thought would be better for the task. I also tried out some milling tips which are basically drill bits that are intended to be used moving side-ways for cutting rather than axially for boring holes, the 194 which came with the Dremel and a 115 which I bought when over in B&Q while looking for some other equipment and noticed they had a Dremel accessory section. Both are shown below.
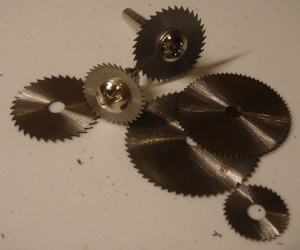
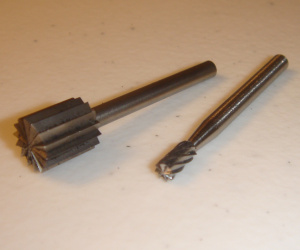
The saw blades were fine for cutting out large chunks but overall my preference is the milling tools as the felt much more versatile in removing material, particularly in this case where there is not the vertical space for the blade to go deep into the material. One of the hazard with rotary tools is how easy it is to slip and take out too much material, so in practice using the Dremel is a balance between saving effort and leaving enough lee-way and my preference is erring towards the latter. Keep in mind that the lines on the template are outside the bounds of the component they were drawn around.
One tool that would have been useful here is the 678-01 cutting guide that would have allowed the milling of straighter edges than could be done by hand unaided, as well as less problems with edges not being parallel and perpendicular due to using the enclosure edge as a reference. However this tool was only discovered having already finished and did not have time to properly try it out before going away for the bank holiday, so how well it works in practice will be a future evaluation.
Widening the gap
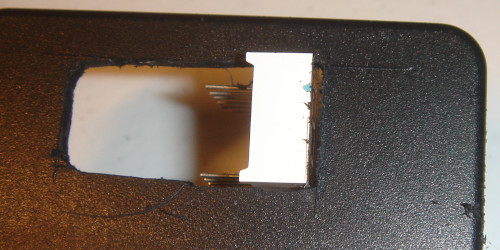
The next stage is to flatten out the worst of the rough cut edges and in the process widen the slot so that the component is able to fit in. Once the component is able to fit in at all the filing needs to progress side-ways until the component is able to slide across the slot. With a small file it was all too easy to end up cutting a notch so a better choice would be a larger file that is able to smooth a larger area down more evenly. When the component slides smoothly from side to side it is due to having nicely parallel top and bottom edges.
Perpendicular ends
Perhaps the trickiest part of the whole process is getting the ends perpendicular to the horizontal edges, and this is where having previously removed too little material is much better than having removed too much. In this case more filing is needed on the lower part of the edge and the one thing to keep in mind it is go slowly and at times only take a stroke or two of the file before checking again. At this stage it is all about taking fractions of a millimetre away at a time.
One trick that sprang to mind is clamping a piece of steel into place as a guide that limits how far the file can cut, but at the time of writing did not have a clamp at hand to firmly hold such a guide in place. Not sure how well this would have worked in practice but suspect it would be better to use a sanding tool instead of a file as sanding rather than filing would be less able to erode than steel rather than the intended plastic.
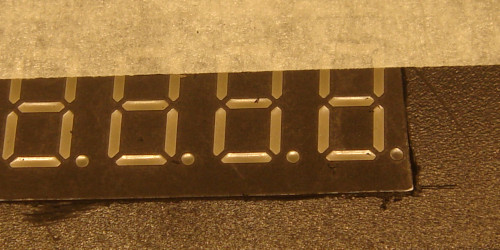
Finishing the corners
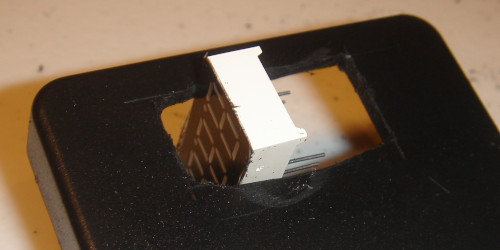
Once the end is nice and parallel a bit of residual material in the corners needs to be removed to get a tight fit, and this is where a small triangular file is helpful. A square file especially a larger one will tend to cut into both sides of the corner whereas the flat edge of a triangular file is more controllable in what material it removes. The edge of the component makes a good guide although by the end of the process it may have picked up damage so a fresh one may need to be used for the final article.
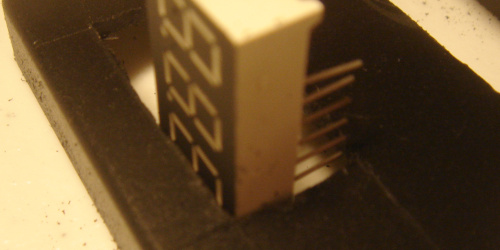
Getting it right for all four corners is not easy and being an experiment there are marks that should not be present, but below shows what a nice and tight fit into a corner looks like. It is possible that any gaps could be filled in but that is beyond the scope of what was being tried here.