Molex mini-connectors
01 March 2023As part of a bigger project I looked into finding compatible wire-to-wire connectors alongside the required crimp contacts and here are the notes from this search, as well as my experience of assembling them into ready-made connector leads. Partial credit to the Big Clive video on crimping of which this is basically a quick-read summary of where to get the parts and how to put them together. I had not specifically set out for Molex branded connectors but they happened to be the ones I ended up sourcing and I only bought a small number of parts since I was not actually sure I had the correctly matching ones.

The tools
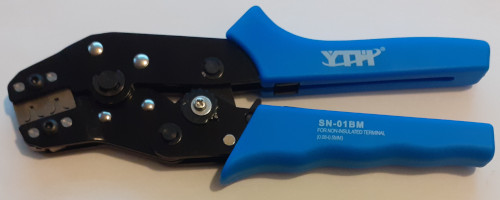
I am unsure where and when I got it but crimping of wires to the contacts was done using a YTHSN-01BM which can easily be bought off E-Bay.
While it may not be the best crimp tool out there and I suspect I may have got lucky in choosing one with the correct crimp size it seems to be of reasonable quality and I had no trouble using it with this size of Molex connectors.
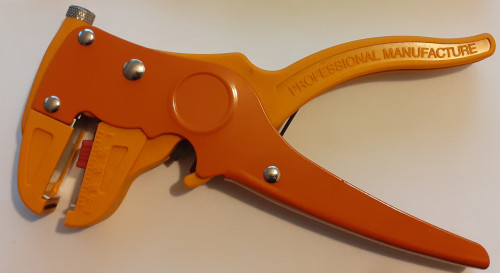
For stripping wires I used a fancy Duratool 808-080-F wire stripper but in reality just about any stripper will do.
In fact I normally use a Klein Tools 11057 stripper/cutter (Digi-Key order code 1742-1270-ND) as the Duratool has a tendency to break thinner wires.
Crimping procedure
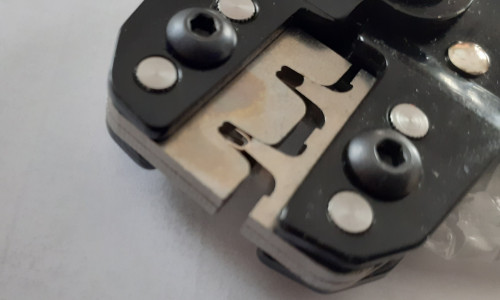
I found it easier to place the contact within the crimp tool's jaws and then thread in the wire rather than trying to place the wire in the contact first then thread it into the crimp tool. The side of the contact that takes the wire should be flush with the crimp jaws as shown below. While I am pretty certain the wire is supposed to be threaded in from the side that has the writing on the handle but I did not check whether things are fine using the tool the other way round.
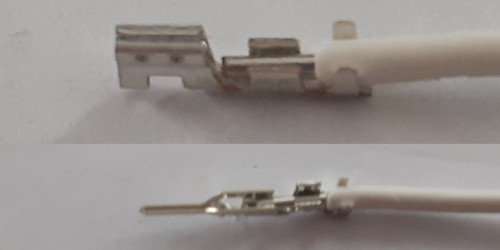
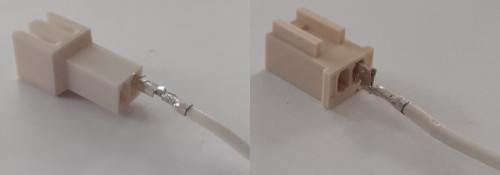
There are two grips within the contacts with one that grips the wire sheathing and the other that makes contact with the wire core itself. About 2–3mm of the wire needs to be stripped and the placement of the wire is shown in the pictures below, where the upper contact is a socket and the lower contact is a plug. Note that while the plug contact has space for a much longer stripped section the socket contact does not.
Once crimped the contact needs to be inserted into the appropriate connector housing upon which a catch will hold it in place, and the orientation the contact should be inserted is shown in the two images below. The left-hand image shows a plug where the catch should go in along the groove whereas the right-hand image shows a socket where upward sticking potion should be towards the arched part of the hole. The inserts show an end-on view of the holes in more detail.
List of components & tools
The plug parts are from the Molex5201 (a.k.a SPOX) series and the compatible receptacle parts are from the 51191 series, the tricky bit working out which plug and receptacle series go together.
The wire and wire strippers used just happened to be what I had at hand and from memory they were ordered back during Covid lockdown.
All components with the exception of the crimp tool were ordered from Farnell.
| Component | Manufacturer | Part Number | Order code |
| Plug housing | Molex | 29-11-0023 |
3049988 |
| Plug contact | 08-70-0102 |
2313579 | |
| Receptacle housing | 51191-0200 |
3050088 | |
| Receptacle contact | 50802-8000 |
2783102 | |
| White 20AWG solid core wire | Alpha Wire | 1563 WH005 |
1741808 |
| Wire stripper | Duratool | 808-080-F |
3125622 |
| Crimp tool | YTH | SN-01BM |
Ordered off E-Bay |